Smarting up my Car with a Raspberry Pi, Crankshaft & OpenAuto
I drive a 2014 Kia Rio. I have no legitimate complaints about it, as it works brilliantly as a daily driver. Sure, I would love an MX5 mk1 (Miata NA) but at my age (23) it serves a purpose of getting me around with no issue. However, it does come with a rather boring radio setup.
Kia did do an upgrade run to their 2014 and newer cars, however I wasn’t eligable as the run was for US cars only. I could get an aftermarket radio, but I currently don’t own the car, as it’s leased. I don’t feel like upsetting the existing working aesthetic.
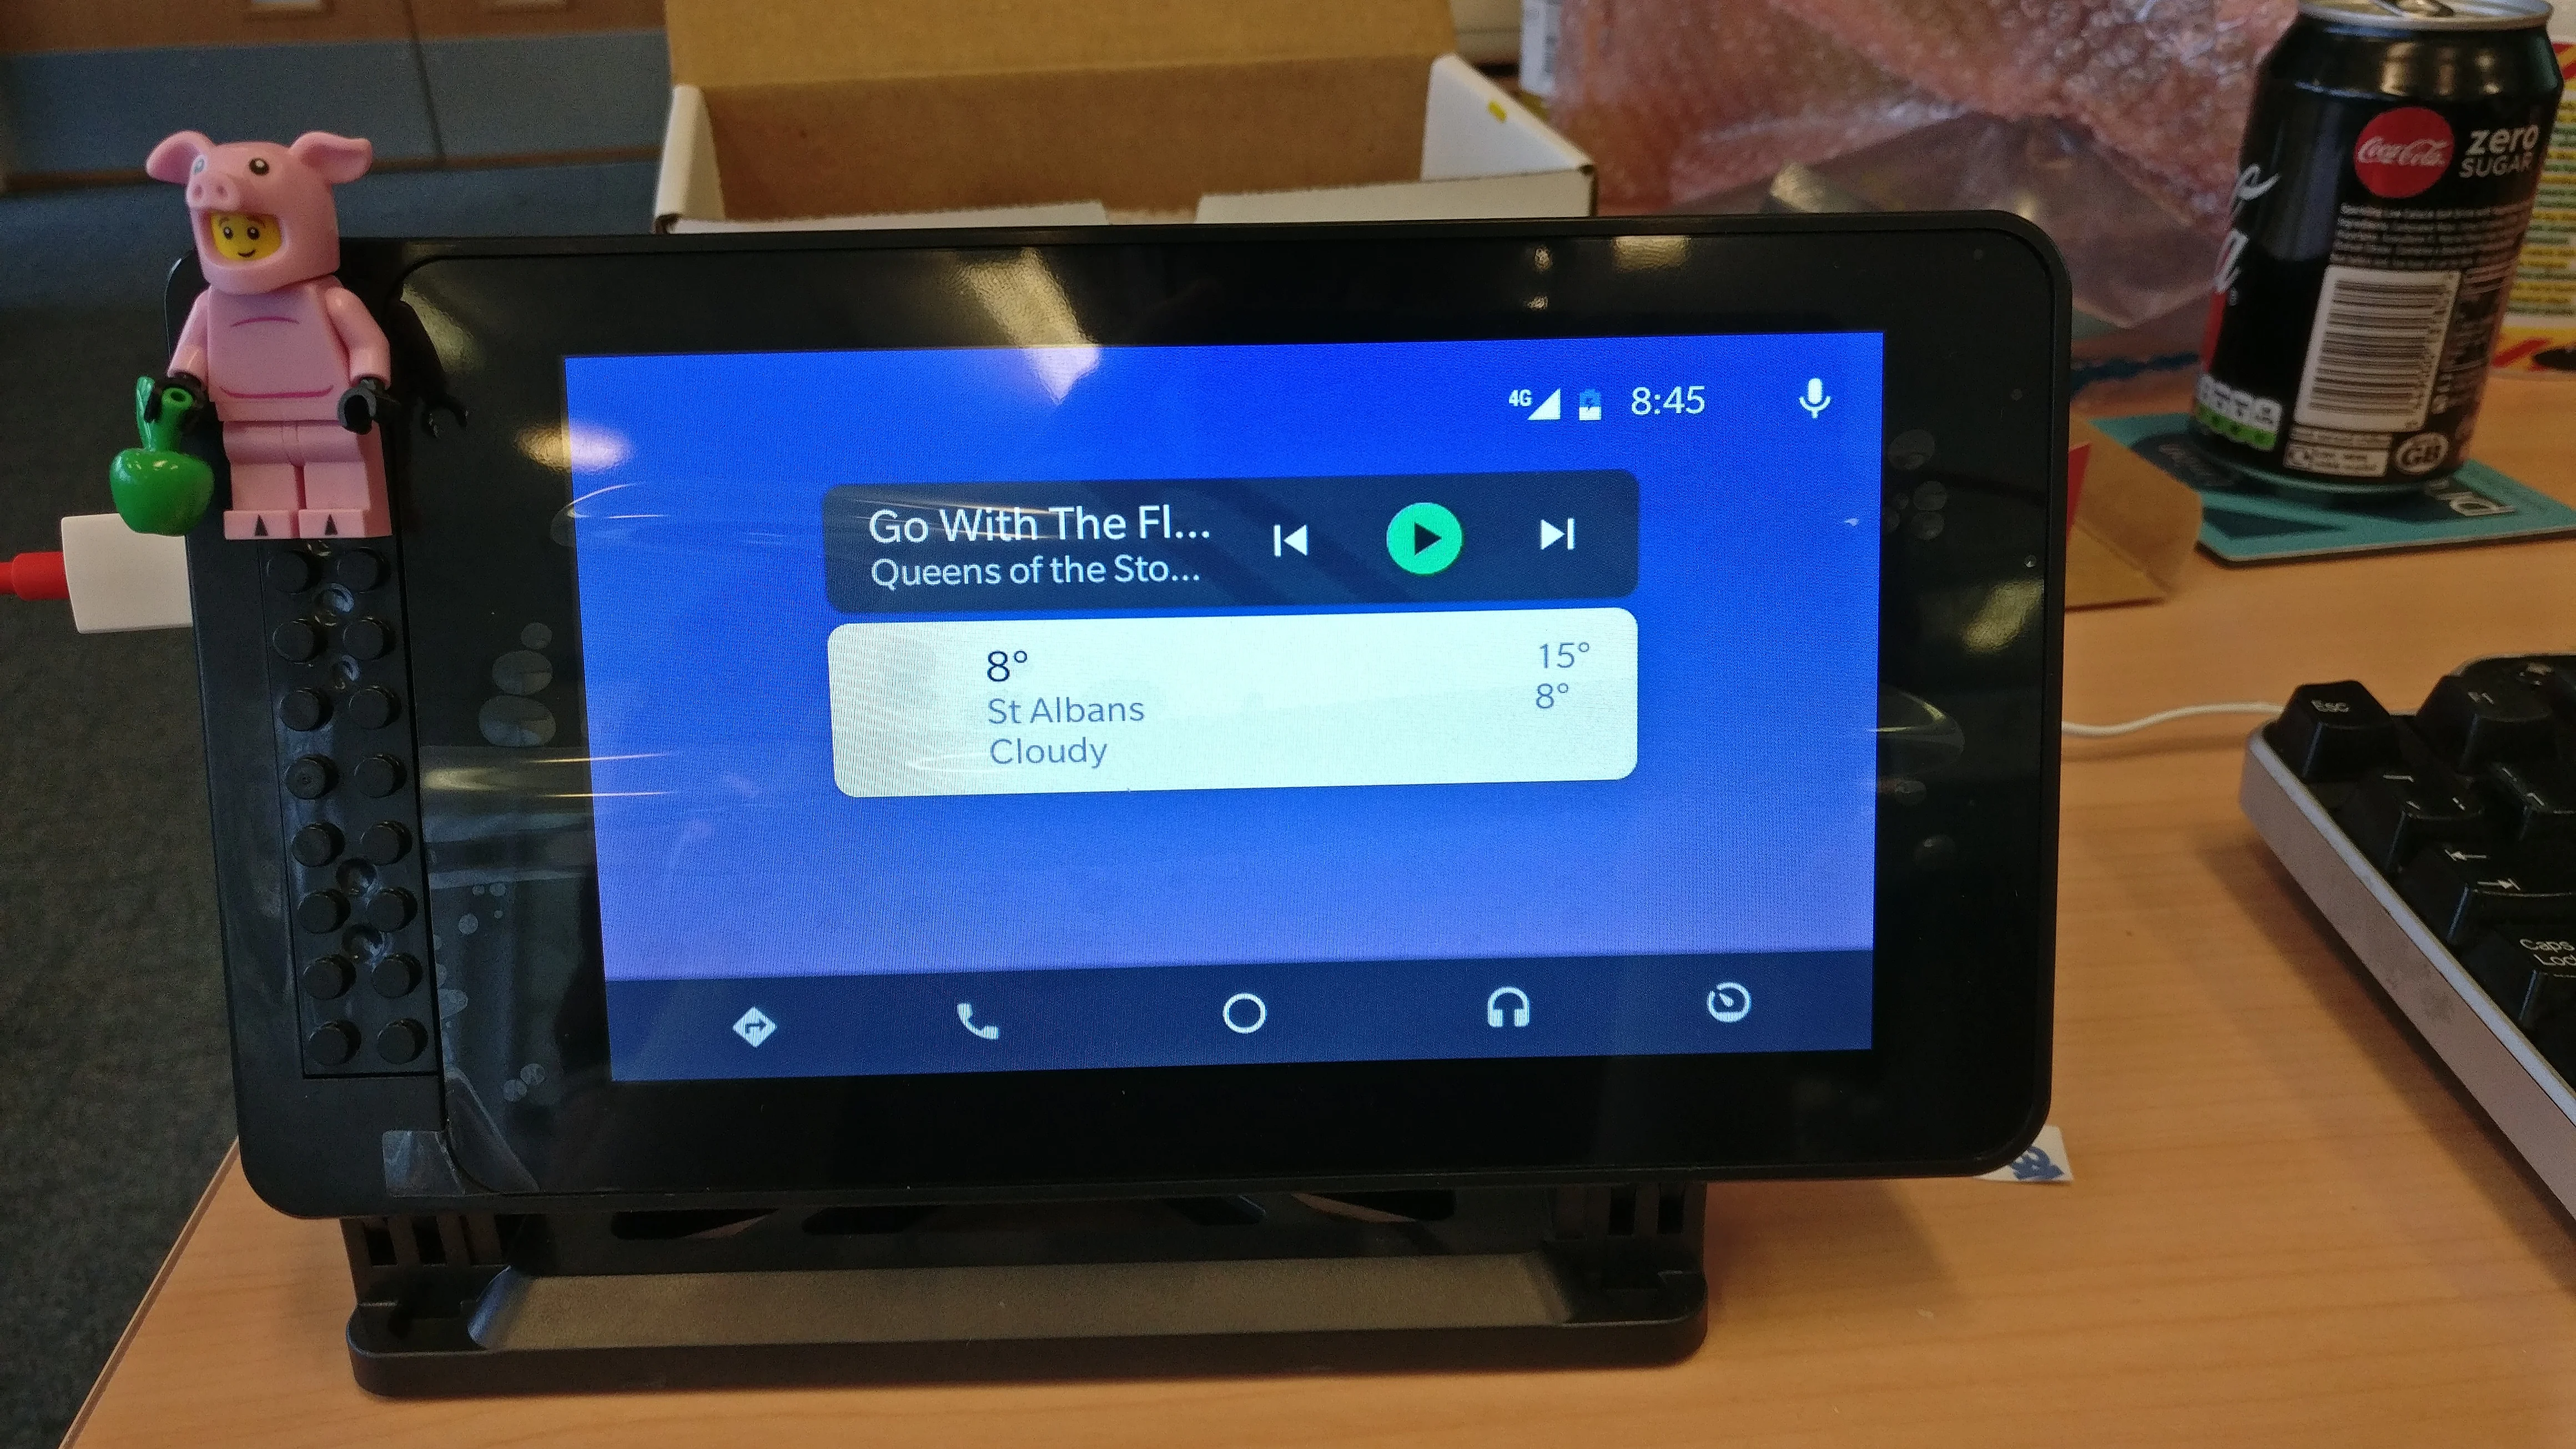
In comes my Raspberry Pi 3. After a quick half-minded Google, I discovered that a fantastic team of developers had got Android Auto on the Raspberry Pi. OpenAuto runs an emulated version of Android Auto and is targeted for Raspberry Pi.
Now this is well and great, but ideally I don’t want to boot up Raspian every time my car ignition turns on – in comes Crankshaft. Crankshaft is pre-configured to run the Pi as a dedicated headunit system. This neatly combines OpenAuto and Raspbian into a nice, plug-and-play system.
The developer behind Crankshaft – Huan Truong – is especially involved in his project. He provides a fantastic, community-driven wiki on GitHub for newcomers and tinkers to the project. There is also a dedicated Subreddit For a rather niche market, it’s refreshing to see someone so heavily involved in a project concept rather than just the initial build and maintenance.
Author’s note – The project has since been moved into an organisation and has multiple developers now. See their GitHub.
The Equipment
For what sounds like a rather large uptake, the resources needed for the project are small. Especially in my case, I am not intending to hook the system up to the CAMBUS, or splice any of the current electrical wiring for power. Luckily, the Kia Rio I own comes with two 12V ports in the front.
- Raspberry Pi 3.
- MicroSD (64GB… All I had spare!).
- Official 7″ Touch screen.
- SmartPi enclosure.
Setting up the software was an absolute doddle. Simply grab the IMG file from the Crankshaft website, and install it to your Raspberry Pi’s MicroSD card (I recommend using Etcher). Configuration files are kept in the FAT partition, so if you need to change settings you can do so easily.
Once I had set the software up and put together the screen and Pi in a case, it was time to whack it in the car!
The Car
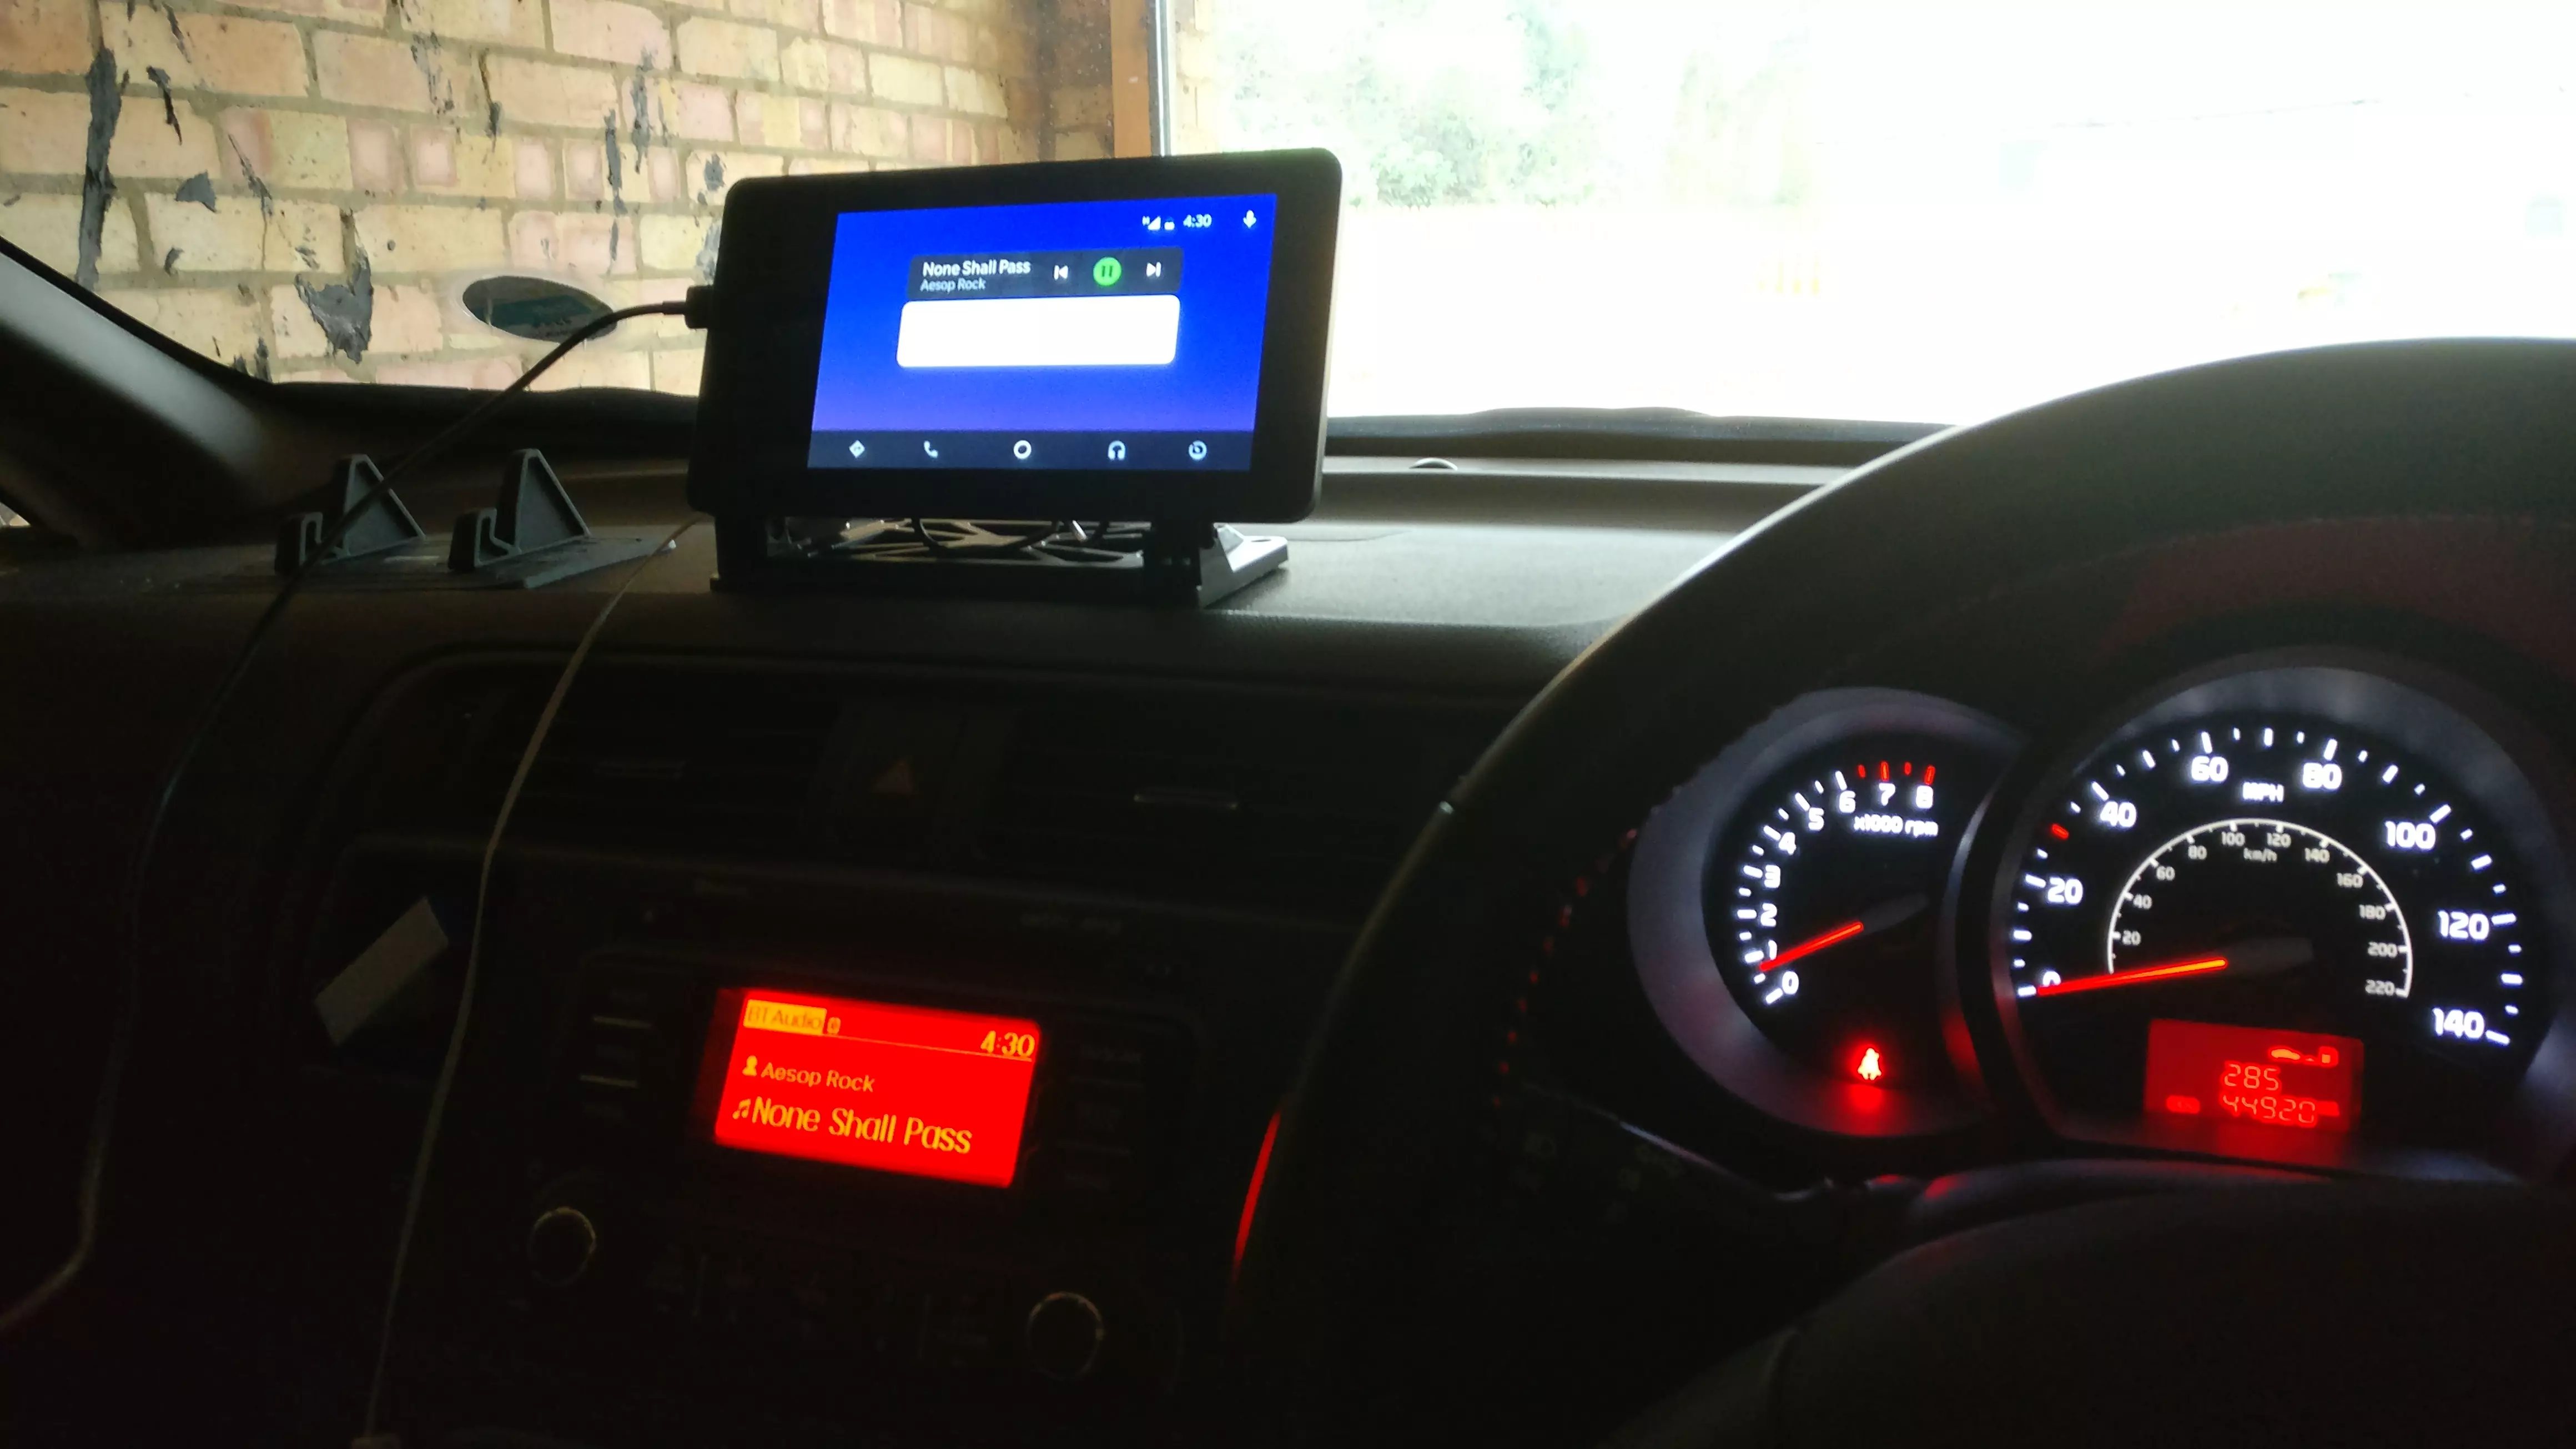
Placed the unit on the dashboard, hooked up a Micro USB cable to the power from a 12V USB adapter, connect up my phone and job done – working Android Auto, basically.
I can best describe this as basically operating as a dumb dual screen. My phone remains connected to the stereo, so my steering wheel controls work the same way they did before. The USB connection streams over visuals to the Raspberry Pi, which then displays the Android Auto interface.
Next Steps
While the whole system works pretty well as it does now, it does come with some bugs to fix. There are some things I would like to change as part of the ongoing project. These include:
- Dedicated mic for OK Google.
- Charge phone as well as connect to Raspberry Pi.
Both of the above need a way of providing power via USB, as the Raspberry Pi is not capable of doing so. I’m considering processes such as running a powered USB hub to power the Raspberry Pi, the Screen, the microphone setup and charging the phone all at once.
An idea to go forward with is in regards to the UK law. Here you can get a 6 point fine for distracted driving, mostly with regards to mobile phone use. This already borders on the law by how much it blocks the view (I fold this right down once I’m finished setting up, not got a Police confirmation on this), and I don’t feel like rustling an Officer’s jimmies by fiddling around with it while driving. So I would like to:
- Consider a more efficient screen solution.
- Mounting the screen below the dashboard (tricky without modifications).
- Using a smaller, more satnav-sized screen.
- Lay it flat and go off window reflections (screen is reversible via software).
- Use a control form without screen interaction.
The latter got me considering a custom Arduino-based solution to making a rotary controller-based system to control the Pi without needing to physically touch the screen.
So this project is far from over in the current state. I’ll keep this blog updated on the progress of this in-car entertainment system, and how it fares.