Back in 2018 I turned my laptop into a Hackintosh device, running High Sierra. I had a donor MacBook mid-2010 that I used to run TonyMac tools to get Hackintosh working. It was a fun if complicated process of trial and error, but the result was always impressive – a craptop unexpectedly booting macOS.
I eventually wiped macOS and re-installed Windows for a WordCamp coding session. The laptop proved to be quite a letdown, and now sits on a shelf collecting dust.
So, let’s Hackintosh it – again!
🛑 If You’re Attempting This…
I hate it when some guides forget to do this, but if you want to try this yourself, you absolutely must have the following or you won’t be able to do it:
- An existing Mac or Hackintosh to build the USB on.
- A copy of Install macOS Mojave.app. I can’t legally provide mine and they do expire, so fresh is good!
- My laptop is Toshiba Satellite Pro L850-1UJ. Other L850’s might have a different setup.
- A large capacity (8GB+) usb storage device.
- Dedicate the laptop – you will erase everything on it.
If you can’t fufill these, then stop now. You’ll be wasting your time. If you want to see roughly how Hackintosh works or how my experience was, then please read on!
🤔 What Does and Does not Work?
This is from my current setup. They might actually have working configs that I’ve yet to find. If you know any, please comment below!
✅ Does
- Screen (full graphics).
- Display brightness.
- Keyboard & trackpad.
- Battery monitor.
- USB.
- Ethernet.
- Speaker audio.
❌ Does not
- Suspend.
- WiFi.
- Keyboard brightness controls.
The L850 has a Qualcomm Atheros AR9462, which does not work in macOS. I happened to have both the Edimax and TP-Link USB wireless adapters, which worked with Chris1111 drivers.
🕓 Changes from 2018
Instead of relying on TonyMac software, I’ve decided to attempt Hackintosh Vanilla. To quote the website:
A vanilla setup implies that the OS itself remains relatively untouched – and that the bulk of the Hackintosh-related kexts, patches, etc are contained on the EFI partition. For all intents and purposes, a vanilla install’s main partition is identical to that of an official Apple computer.
Other than the different approach, I had the following caveats:
- Instead of High Sierra, I’m installing Mojave.
- My MacBook blew up*, so I’m using a combination of Virtualbox and my partner’s Macbook Air.
- This time, I will not be undoing it. This will be a continuous project until the laptop dies.
*An important point I must raise here. I bought my mac from an eBay listing a few years back. One day I plugged it in and it literally blew up. Smoke came from the plug and I had a residual shock. I put the MacBook and the dead charger in a cupboard and forgot about it. Recently, I pried open the plug to find it was a fake (or a non-recall), and the fuse was bypassed. Please, check your chargers! I now have a plug in RCD when using eBay auction purchases, just in case…
👩💻 The Process
Setting up a Bootable USB
My trusty SanDisk Cruiser was still lying around, but I’d long since wiped it. So I wiped it without a moment’s consideration of the content (not recommended, of course) and prepped it for being a macOS conduit!
Installer expires?!
Now I keep an archive of macOS installers because… Well, I don’t really know why. Using my partner’s Mac I created a bootable macOS drive using an archived Mojave, only to find I got the error:
This copy of the Install macOS Mojave application is damaged, and can’t be used to install macOS
So it turns out these macOS installers expire! Like a bad carton of milk, macOS would simply refuse to run (other tools like Disk Utility and Terminal were fine). I tried multiple solutions I found on Google to bypass it, but none worked.
It would seem that Apple sign a certificate on the day you downloaded the installer from them. If you wait too long, macOS deems it damaged. You appear to be able to reset the system clock or edit the date via Terminal, but you need to know when your package was signed. Unfortunately, I didn’t note the date down. I discovered however I could re-download it from Apple still. Phew!
…
Back on track (and still on my partner’s Mac), once I had created the Bootable USB, I used Did’s autobuild of Clover to install Clover onto my USB. Complete shout-out to anyone who works on Clover in any form, as this fantastic bit of kit is what will get your Mac installation drive booting on a PC, and beyond!
In my previous attempt I had a config.plist that worked wonders with my current setup. However, the default config that comes with Did’s Autobuild was apparently completely fine for this laptop. This makes a great starting point!
I ran the Clover Installer package, changed the location to my USB drive, and didn’t change a damn setting. Install, and (safely) yanked that newly primed Hackintosh stick out.
UEFI/BIOS Changes
This laptop comes with UEFI and legacy BIOS mode. Supposedly Clover works with both, but for my install I enabled UEFI mode and disabled safe boot. Saved changes and exited.
Smashing F12 like the refresh button, My trusty Toshiba asked what to boot from. What else but the Macintosh conversion stick?!
I left Clover alone, and it booted straight into the Mac recovery screen. Now, if you’re going to commit to this make damn well sure your Toshiba has nothing important stored on it, and is backed up! This process (or at least how I did it) will erase everything!
Pop open Disk Utility from the Utilities menu. I had to click the button at the top left and show all devices. On my main hard drive (not the USB stick) I selected it and chose erase. I made sure to choose Mac OS Extended (Journaled). APFS might be supported, but I’d rather use the tried-and-true format, and the GUID Partition Map. Hooray, the whole disk is now in Mac format!
Excluding the certificate expiry, the installation ran without a hitch. My network adapters (ethernet and wireless) were not detected so I opted to install without connecting to the internet. I also selected British – PC as my keyboard format, which seems OK except alt and special are swapped round.
Storm through the install like a regular Mac. After a lot of waiting and reboots, you’ll be greeted with the Mac screen. Hooray, you’re done(ish)!
🛠️ Getting Stuff Working
Most things are working at this point, or at least the most important stuff. Networking, sound, and laptop detection are not.
As a basepoint, I found this config.plist from RehabMan worked well as a jumping point. I renamed the existing plist as ‘legacy.plist’ and used this file (with a few modifications) as the main driver.
I used the following kexts (In the EFI partition, in Clover/Kexts/Other):
- FakeSMC, what doesn’t this one do?
- Lilu, a dependency for almost all Hackintosh kexts.
- VoodooPS2Controller, enables keyboard and trackpad.
- ACPIBatteryManager, battery is detectable by MacOS.
- NativeBacklight, MacOS detects display has adjustable brightness.
- OSX Realtek Network, by RehabMan.
- VoodooHDA for Intel HD Audio out speakers.
Great. With the above, your keyboard, trackpad, audio, battery, brightness & wired network now work.
Native backlighting took some jiggling to get working. RehabMan on TonyMac has a great guide to getting this working (I installed the kext into Clover, not MacOS).
🤔 The Verdict
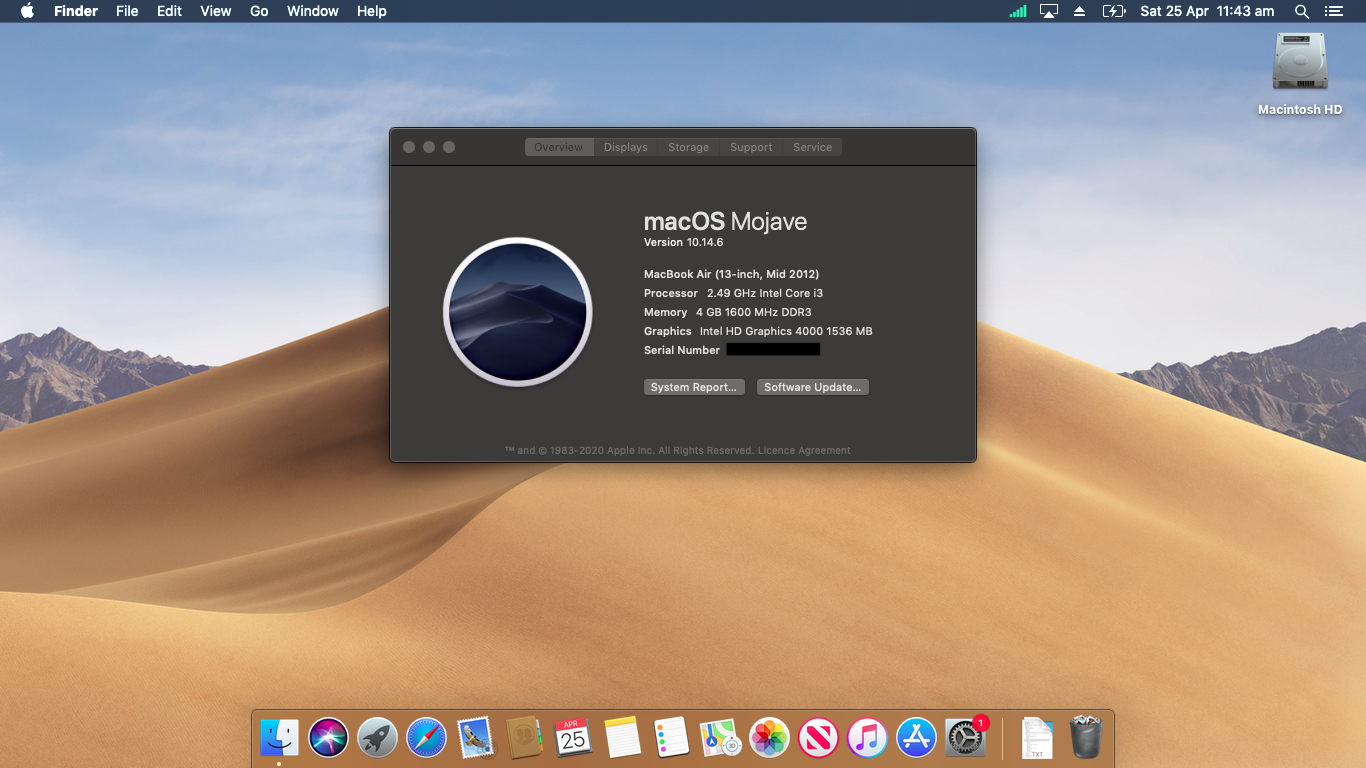
I’ve actually been finding the performance on this base-spec (inc. original hard drive) runs really well on MacOS. There are slowdowns, and I have not tried gaming on this machine, but nothing more than I would expect from a very old machine. Plus Apple tends to care for their ageing old Intel machines really well, so I’m not too surprised.
The lack of sound and wireless networking is troublesome though. I make do with a USB wireless dongle, but until I can find a solution to let MacOS see my actual WiFi card, I may not be able to upgrade to MacOS Catalina. The lack of ethernet detection also causes problems with the Mac App Store, which seems to always reckon I’m not connected (despite updates downloading just fine).
So, I’m gonna keep it!
Catalina?
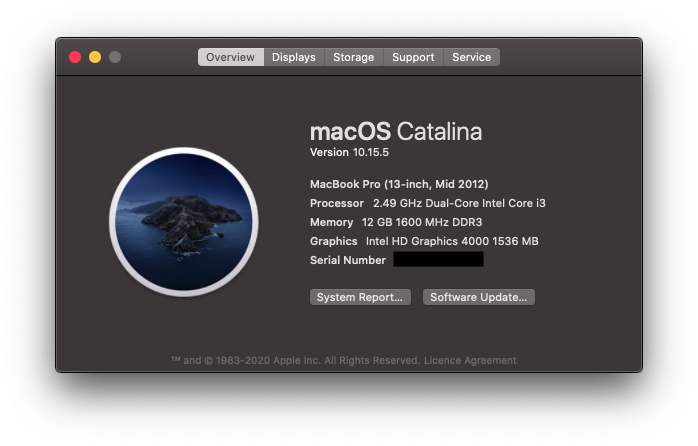
The upgrade to Catalina was a sucess! However, some changes were needed first.
I had to add an EC ACPI patch to allow the macOS Catalina installer to run past the first stage.
Based on this information, I also added this ACPI configuration to clover/acpi/patched. So far I’ve only added the EC configuration in the effort of trying to install the Catalina update.
After the installation of Catalina, my screen brightness controls stopped working. To remedy this, I installed WhateverGreen kext and enabled SetIntelBacklight and SetIntelMaxBacklight (Devices in Clover Configurator). AddPNLF might be needed from ACPI section.
Big Sur and Beyond?
Alas, I’ve hit a roadblock. Easy to blame Apple on this, but at this point not only is Ivy Bridge nearly 10 years old, but Apple are also moving to ARM architecture. Catalina was rocky enough!
I’ve tried adjusting my Clover for support and simply facing constant kernel panic. At this point for other purposes I reinstalled Windows for a year, and it seems community progress has come a long way, so I will not give up just yet.
Since the community has moved from Clover to OpenCore, I’ll be trying that off the bat to continue the progress of this Hackintosh. If all goes well, I’ll make a seperate post so watch this space.
🤖 The Future
With no dire need to use this laptop (the battery is really dead), I’m going to persist on trying to get Hackintosh to work as much as possible. It really does feel rewarding, and you never get tired of the shock some people have when they see your craptop suddenly boot MacOS.
Although they will question “why not buy a real Mac“…